This little guide will show you how to make a spark plug spark - and control it from an Arduino. Using a Mosfet or a dedicated spark plug drive IC.
Basic spark plug circuit that works
You need

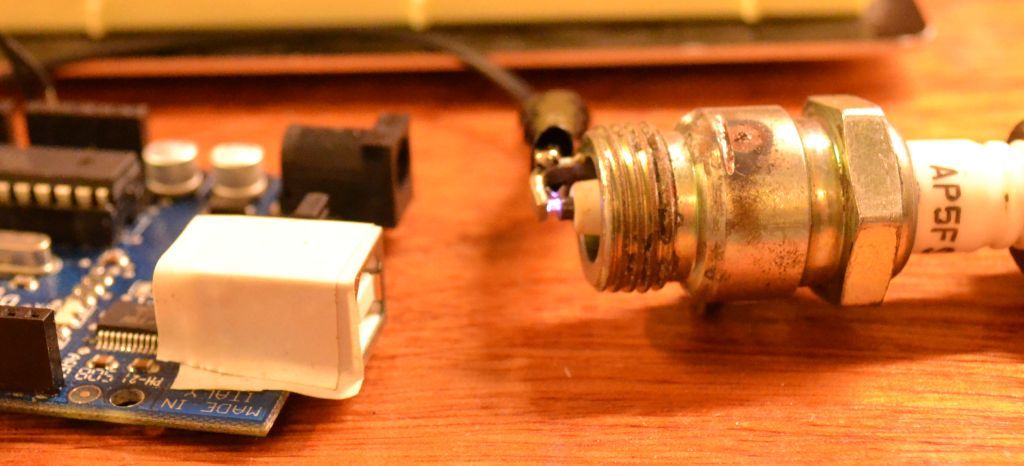
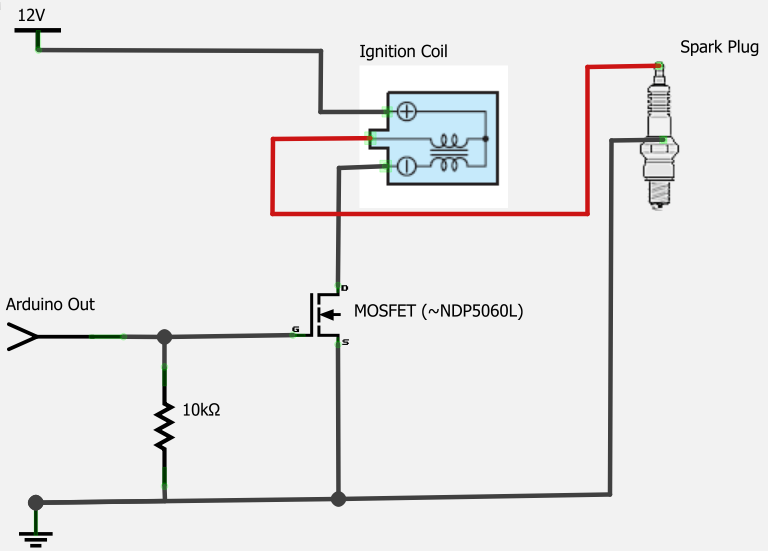
- Ignition coil. (Normal car ignition coil. Buy in a cheap auto part store for around 15 €)
- Spark plug
- Ignition Cable
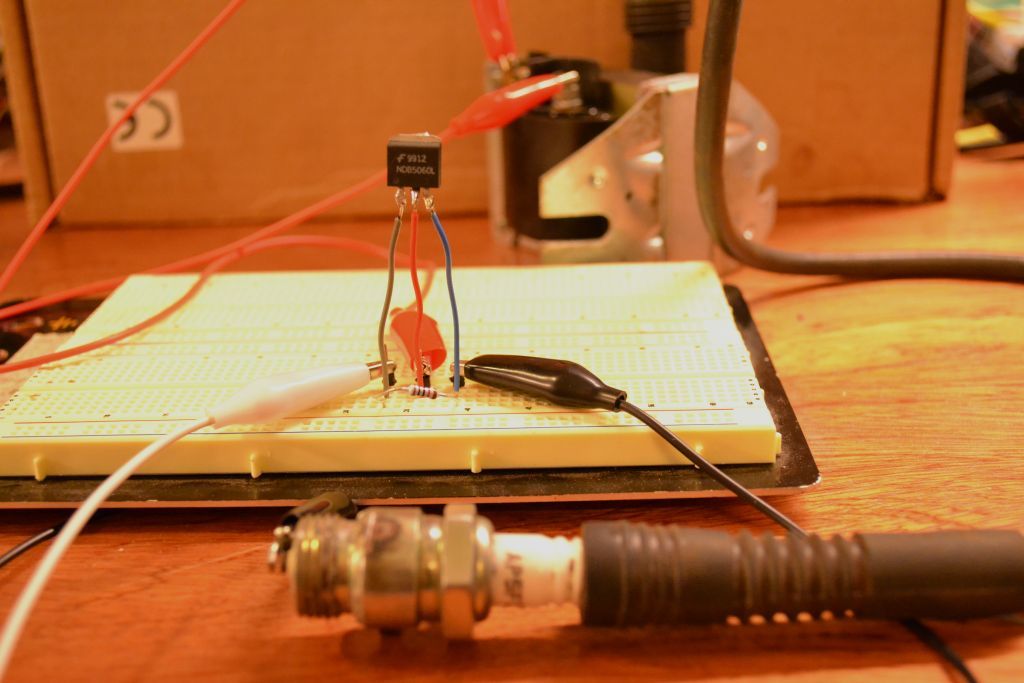
- Power MOSFET (N-channel for these examples) - I use a NDP5060L, but any powerful type will go)
- 10 K resistor
The spark plug will get high voltage from the ignition coil, when the coil is pulsed via the MOSFET.
Warning:
- The high voltage from the ignition coil will bite you, but probably not kill you, if you touch it.
- Radio Frequency interference will be generated from the spark plug, that can disturb sensitive equipment
- Some computers and Arduino boards have a hard time around the sparks.
- Put a shield around the cable (tinfoil) and ground it, and you should be good.
Testing the circuit
Pulsing the input to the MOSFET to 12 V will make the spark plug spark. (Arduino Out on the schematic to 12 V)
Connect it to the Arduino!
Power Mosfets can often be driven directly from the Arduino.
- You only need to give very short pulses on the output pin of the Arduino. A few milliseconds is enough to charge the coil.
- The spark plug fires when the pin goes LOW
- Remember to end the pin controlling the Mosfet on LOW - If you keep it high for long, you might burn your Mosfet from the current, that runs through the coil.
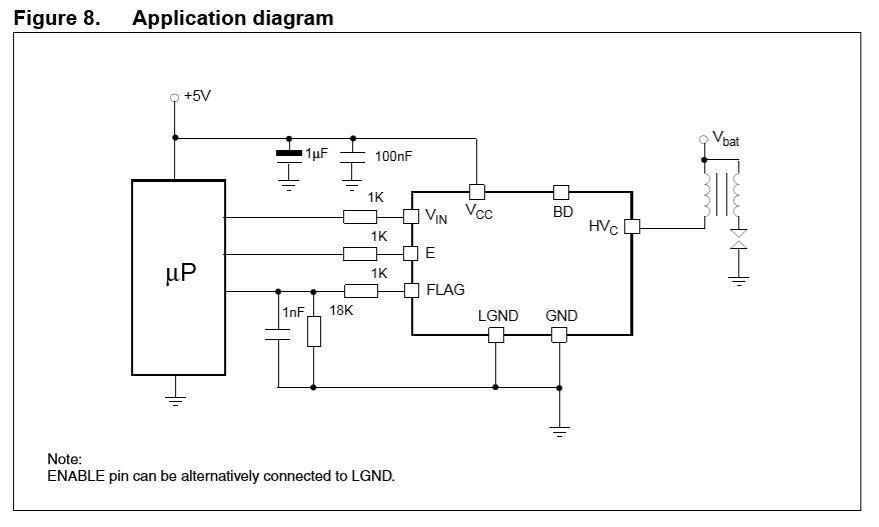
Using a dedicated spark plug driver IC like the VB525SP-E
Using a Mosfet is a bad idea for anything that you want to be solid. It is very easy to fry the Mosfet, if you keep it on for longer than it takes for the coil to get "charged".
Since I found it, I have used the VB525SP-E for many projects. And it just keeps on working. It has internal thermal protection, that makes sure it does not die.